An R Introduction
Looking for some help installing R? It is your first time opening R or RStudio? Here are some helpful tips for typing out your first code!
Friday, Aug 21, 2020 By Hope Snyder.
This is where the fun begins! And it’s possibly the hardest part… It can be a little nerve racking and stressful, wanting it all to go smoothly. Consider this like making a recipe you never have before. You gather up all of the ingredients, make sure you have all the right tools, then combine them in a certain way to make something fabulous. Along the way you might find that the chocolate isn’t melting properly and you’ve used the entire package or you need a food processor and the closest thing you have is a hammer and a plastic bag. All of that is frustrating, but it’s a learning experience for the next time you make it. This is the start of your coding adventure (at least in R). It’ll be rough at first, but practice makes perfect!
First Things First: Installation
This is the “collecting the right tools” step. These are the tools I’ve found most helpful when it comes to working in R. Other options do exist, but I’ve found that my workflow is the best with these tools.

What you need:
- Some sort of LaTeX processor/editor software. This will be helpful when you create documents in R (see below). Each operating system has its own requirements but you can find the details here. With LaTeX, a text editor for the program would be helpful for just in case situations. I recommend TeXMaker.
- R, of course! The R Project website might look a little archaic, but it holds everything you need to get R installed. How to get to what you need:
- Click on the “download R” link under Getting Started
- Choose a mirror; the cloud link will choose for you
- Choose the link for your operating system
- RStudio is the best user interface software I have found for R. It has a lot of great features that will help you keep track of everything related to your code.
Hopefully before you start downloading and installing things, I put these programs in an order on purpose. Sometimes, R has problems communicating with the LaTeX programs if they are installed after R. To avoid those later down the line, I would recommend installing that program first.
Where to Begin?
Hooray! If all the magic installations worked you should have a working version of R. I recommend using the RStudio interface while you work with R. It contains lots of information about the code you are working on, such as what is in memory and what code has been run previously. It also allows for customization the interface under the Global Options. You can decide how the windows are positioned and the appearance of the code.
Once you have your interface set up the way you want it, it’s time to start coding! In RStudio, you can type into either the Console or the Text Editor window. While on a line of code, you can hit Ctrl + Enter to run that piece of your code. You can use R as a basic calculator and as a programming language. Let’s go through a small example to get you started.
R comes with a few data sets all ready installed. The one I like to use for examples is mtcars. If you type that into the console and hit Enter (run the code), R will print out the entire data set. It has information about various vehicles and their miles per gallon. We can get more detail about the variables by using the function help(). The details appear in the Help window in RStudio. Let’s plot the miles per gallon against the weight of the car.
# First, call the data.  (Note, the # creates comments in your code.  These lines will not be run.)
dat <- mtcars

# Next, I am going to rename the variables that we are interested in.
# You can call a specific column in a data table using data$name
miles_gallon <- dat$mpg
weight <- dat$wt

# Because weight is listed in tons, let's transform it so we can see the weight in pounds
weight <- weight*1000

# Now to plot the variables against each other with the X variable listed first.
plot(weight, miles_gallon)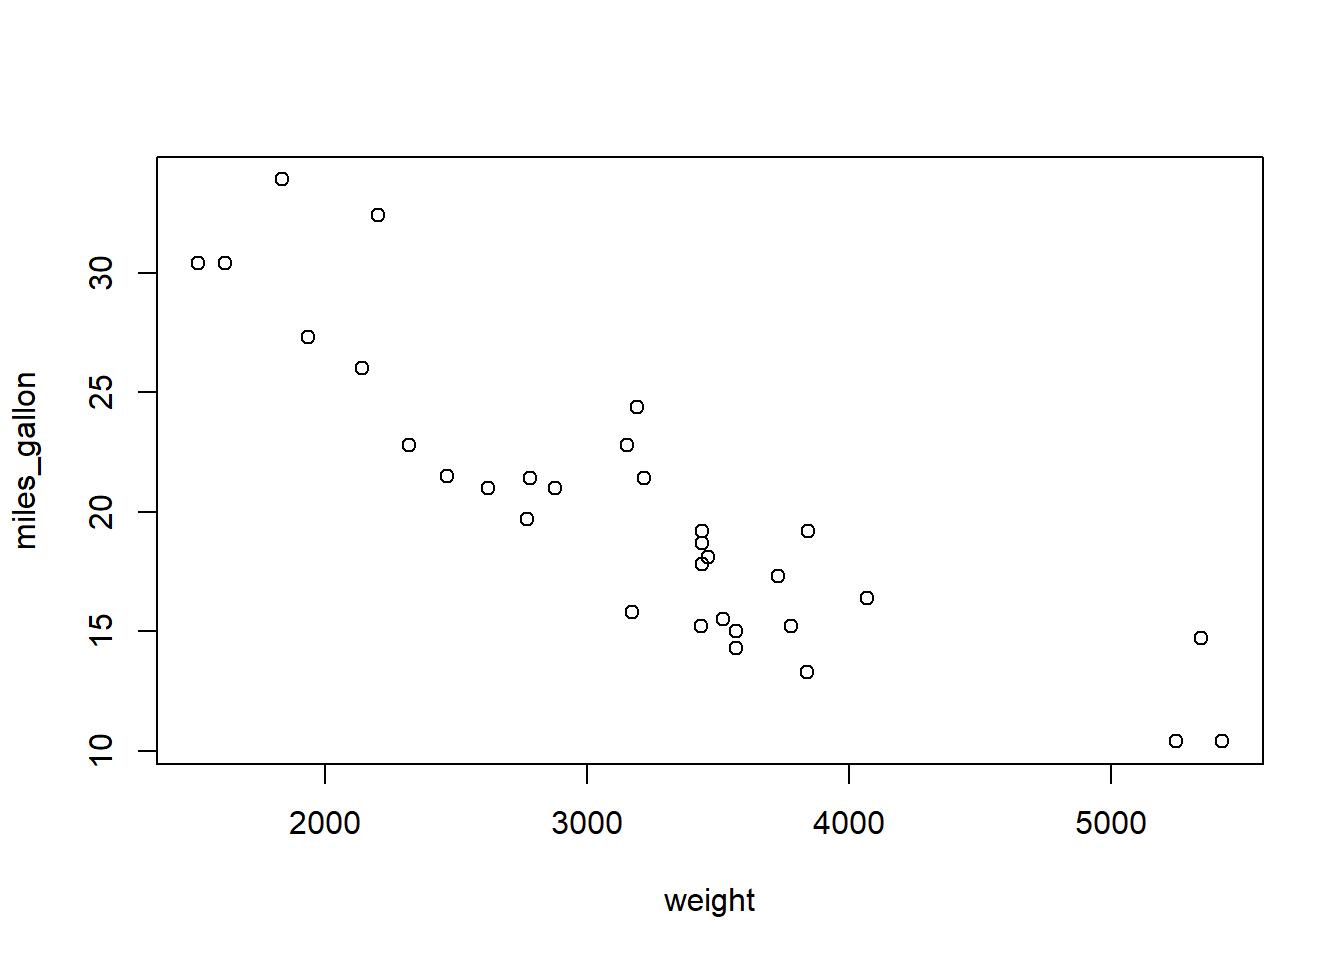
Congrats! You have just run your first piece of code in R! It all gets better from here!
What Should I Do Next?
The heart of R lies in its packages. Packages are a collection of functions and data sets that can be added to R. The packages are often written by other R users to make some task or calculation easier to do within R. If there is something you want to do in R, it is very likely that someone out there has written a package to do exactly that. The packages include documentation and tests to show how to use the functions within each package.
Many are available to be installed from CRAN, the same place you found R. You can install new packages by using the function install.packages(). A few others can be downloaded from GitHub. Be warned! Those are likely still in development and can be filled with bugs. These require another package to download. You can download from GitHub using the following code:
library(devtools)
install_github(name_of_developer/name_of_package)
There are so many good packages out there to use within R. Here are a few of my favorites and ones I think are a good place to start.
tidyverse: This is a collection of packages that help with the readability of your code. There is a bit of a debate about whether or not to use this collection, but these packages include a lot of wonderful functions for data manipulation.devtools: To help with programming and writing packages of your own in R. To use this package, you might need to get RTools as well.ggplot2: This will make your plots look amazing!usethis: Automates repetitive tasks during project set up and development.lubridate: Makes working with dates so much easierrmarkdown: This will help with formatting when you make documents within Rshiny: For making interactive applications within R